Most home pizza makers own an oven thermometer. Fewer own an infrared thermometer. Almost none understand why the two give different readings and what each number actually means for the pizza sitting on the baking surface. This gap in understanding is responsible for more bad pizzas than any recipe error.
Here is the core problem: your oven thermometer reads air temperature. Your pizza bakes primarily through surface contact, not air. The temperature of the baking steel or stone — the surface your pizza physically touches — is what determines whether you get a beautifully leoparded bottom or a pale, undercooked base. And the only way to know that surface temperature is with an infrared thermometer.
What Each Thermometer Actually Measures
Oven Thermometer (Ambient Air)
A standard oven thermometer — the kind you hang from a rack or stand on a shelf — measures the dry-bulb temperature of the air inside the oven cavity. This is the number your oven’s built-in thermostat is also trying to regulate.
This number tells you:
- Whether your oven is actually reaching its set temperature (many do not — 25-50F discrepancies are common)
- The general thermal environment for convective heat transfer
- When the oven has finished its preheat cycle
This number does NOT tell you:
- Whether your baking steel or stone has actually absorbed enough heat to bake pizza
- The temperature of the surface your dough will physically contact
- Whether there are hot spots or cold zones across your baking surface
Infrared Thermometer (Surface Temperature)
An infrared (IR) thermometer measures the thermal radiation emitted by a surface. You point it at a specific spot on your baking steel or stone, pull the trigger, and get the temperature of that exact location.
This number tells you:
- The actual temperature of the baking surface — the number that determines bottom crust quality
- Whether your surface has recovered between pizzas (critical for back-to-back baking)
- Where hot spots and cold zones are on your surface
- When your surface is genuinely ready, not just when the air is hot
The “Ready Beep” Lie
Myhrvold’s team at Modernist Pizza demonstrated one of the most important findings for home pizza bakers: home oven air heats in approximately 21 seconds, but the oven walls and baking surfaces take vastly longer. [Myhrvold pp. 422-423]
When your oven beeps to say it has reached 550F, the air near the thermostat has hit 550F. But your baking steel — a dense slab of carbon steel or a thick cordierite stone — may still be 100-200F below target. The thermal mass of these surfaces means they absorb heat slowly and steadily, lagging far behind the air temperature.
At 22 minutes of preheating, Myhrvold’s measurements still showed significant cold spots on baking surfaces. The minimum preheat recommendation for a baking steel is 30 minutes after the oven reports reaching temperature. For maximum performance, 45-60 minutes is better. [Myhrvold pp. 422-423]
The only way to know when your surface is actually ready is to check it with an IR thermometer. Not the oven thermometer. Not the oven display. Not a timer. The IR gun pointed at the center of your steel.
The Preheat Protocol
- Set oven to maximum (typically 500-550F)
- Wait for the “ready” beep — ignore it as a baking signal
- Continue preheating for at least 30 more minutes
- Check center of baking surface with IR thermometer
- Check corners and edges — look for the coolest spot
- Ready when the coolest corner is within 9F (5C) of your target
- Preheat 15-25F above your target to compensate for the temperature drop when you open the door to launch your pizza [Myhrvold pp. 422-423]
The Emissivity Problem: Why Surface Material Matters
Here is where infrared thermometry gets genuinely tricky, and where most pizza content online gets it wrong.
Emissivity is a material’s efficiency at radiating thermal energy. It is measured on a 0-1 scale:
| Material | Emissivity | What This Means for IR Readings |
|---|---|---|
| Matte black surface | ~0.95-0.97 | Reads very accurately — emits nearly all thermal radiation |
| Cordierite pizza stone | ~0.90-0.95 | Reads accurately — reliable reference surface |
| Sooty/seasoned stone | ~0.95 | Reads accurately — soot increases emissivity |
| Clean firebrick | ~0.68 | Reads LOW — reflects back significant radiation |
| Seasoned carbon steel | ~0.50-0.70 | Reads LOW — depends heavily on seasoning level |
| Clean/shiny carbon steel | ~0.30-0.50 | Reads VERY LOW — highly reflective surface |
| Polished stainless steel | ~0.10-0.15 | Reads extremely low — essentially a mirror to IR |
What this means in practice: a clean steel baking surface reads dramatically lower on an IR thermometer than its actual temperature. If your IR gun reads 450F on a shiny, unseasoned baking steel, the actual surface temperature may be 550F or higher. A well-seasoned (dark, matte) steel reads much more accurately because the oxidized surface has higher emissivity.
Myhrvold’s team discovered that this emissivity difference has a counterintuitive practical effect in wood-fired ovens as well: a clean firebrick oven floor (emissivity 0.68) actually reaches a MUCH HIGHER equilibrium temperature than a sooty floor (emissivity 0.95). The clean floor reflects more radiant heat from the dome, absorbing less of it, which means the surface itself gets hotter. Meanwhile, the sooty floor absorbs more radiation and distributes it more evenly. Result: clean floor = higher burn risk with hot spots; sooty floor = more even, forgiving baking. [Myhrvold pp. 384-385]
Adjusting for Emissivity
Better IR thermometers include an adjustable emissivity setting. If yours does:
- Set to 0.95 for stone/cordierite
- Set to 0.85-0.90 for well-seasoned (dark) carbon steel
- Set to 0.50-0.60 for lightly seasoned carbon steel
If your IR thermometer does not have adjustable emissivity (most budget models do not), use these workarounds:
- Masking tape trick: Place a small piece of high-temp masking tape on the surface during preheat. Tape has emissivity ~0.95 — read the tape, not the bare steel. (Remove before launching pizza.)
- Seasoning baseline: Season your steel well (dark, matte patina). Read it at a known temperature (boiling water test: aim at water surface = 212F reading with emissivity at 0.95). Note the offset and apply it mentally.
- Stone reference: If using a stone, your readings are inherently more accurate since stone emissivity is close to 0.95.
What Temperature Should You See?
Once you trust your readings (emissivity accounted for), here are the surface temperature targets. For a deeper breakdown of temperature management across different setups, see the home pizza oven temperature guide.
Home Oven (Steel or Stone on Upper Rack)
| Style | Surface Target | Air Temp Setting | Notes |
|---|---|---|---|
| Neapolitan-style | 550F+ | Max (550F) + broiler | Broiler superheats surface; check with IR to verify |
| New York | 525-550F | Max (550F) | Even coverage across surface |
| Pan pizza | 475-525F | 500-550F | Lower surface temp, longer bake |
Portable Oven (Ooni, Roccbox, Dome)
| Style | Center Stone Target | Back Stone | Front Stone |
|---|---|---|---|
| Neapolitan | 750-850F | 850-950F | 650-750F |
| NY-style / thicker | 700-750F | 750-850F | 600-700F |
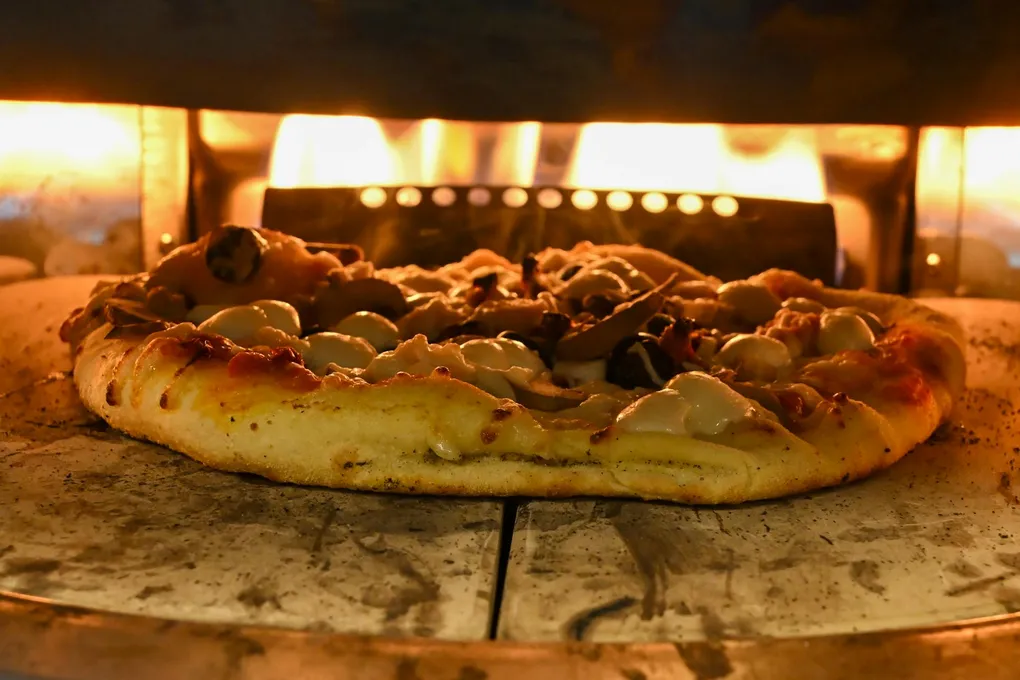
Critical for portable ovens: Always measure the CENTER of the stone, not the back near the flame. The back reads artificially high due to proximity to the heat source and can be 200F+ hotter than the center where your pizza actually sits. [Ooni, Iacopelli]
Between Pizzas: Recovery Check
After removing a pizza, the contact zone on your baking surface drops in temperature. Before launching the next pizza:
- Wait 2-5 minutes
- Check the center of the surface with IR
- Verify it has recovered to within 25F of your target
- For portable ovens: crank flame to high immediately after removing pizza, then verify recovery before next launch
A 3/8” steel recovers significantly faster than a 1/4” steel (more thermal mass = more stored heat to replenish the contact zone). This is one of the main arguments for thicker baking surfaces when doing multiple pizzas in a session.
Product Comparison
| Product | Range | Emissivity | Key Feature | Price |
|---|---|---|---|---|
| Ooni Digital IR (Gen 2) | -22F to 999F | Adjustable, pre-calibrated for cordierite | 12-segment color ring for instant visual reading | ~$50 |
| Gozney IR Thermometer | -58F to 1,022F | Adjustable | LED backlit, continuous read mode | ~$50 |
| ThermoWorks IR IND | Wide range | Full adjustable | Full circle laser defines exact measurement area — best accuracy | $99 |
| ThermoWorks IR-Gun | -76F to 1,022F | Adjustable | Basic but reliable, ThermoWorks quality | ~$50 |
| Etekcity Lasergrip | Standard range | Fixed (0.95) | Dual laser, budget pick | ~$25-35 |
What to Look For
Must-have features:
- Range to at least 900F (for portable oven users) or 600F (home oven only)
- Laser pointer for aiming accuracy
- Backlit display for reading near hot ovens
Worth paying for:
- Adjustable emissivity — essential if you use a baking steel
- Full-circle laser (ThermoWorks IR IND) — shows you the exact area being measured, not just a point. The measurement spot is always larger than the laser dot suggests.
- Distance-to-spot ratio of 12:1 or higher — better accuracy at the working distances inside an oven
Nice to have:
- Continuous read mode (hold trigger for live updating readings)
- Max/min hold
- Ooni Connect Hub (~$80-100) provides Bluetooth + app with real-time stone and food temperature monitoring — useful for data-driven bakers who want to build preheat profiles
Do You Still Need an Oven Thermometer?
Yes. An oven thermometer serves a different and complementary purpose:
- Oven calibration — discovering that your oven reads 525F when set to 550F is critical knowledge. An oven thermometer reveals this. An IR thermometer pointed at the air reveals nothing.
- Broiler cycling — when you switch from bake to broil, the oven air temperature changes. An oven thermometer tells you what the air is doing.
- Ambient monitoring — useful during long preheats to confirm the oven has stabilized before you start the final surface-saturation phase.
The oven thermometer gives you the environmental context. The IR thermometer gives you the baking-surface reality. Together, they tell you the complete thermal story of your oven.
A Practical Workflow
Here is how both thermometers work together in a typical pizza session:
- Place oven thermometer inside oven near the baking surface.
- Set oven to max. Wait for beep.
- Oven thermometer confirms oven has reached set temp (or reveals how far off it is).
- Continue preheating 30-45 more minutes.
- IR thermometer — check center of baking surface. Check corners.
- When surface hits target (and coolest corner is within 9F), prep your first pizza.
- Preheat 15-25F above target to absorb the door-opening temperature drop.
- Launch pizza. Bake.
- After removing: IR check the surface. Wait for recovery before launching the next one.
- Repeat step 9 for each subsequent pizza.
The entire investment — a decent oven thermometer ($10-15) plus a capable IR thermometer ($25-50) — costs less than a single bad pizza night where you served pale, undercooked bases because your oven lied to you.