Most pizza guides treat the home oven as a limitation to apologize for. It isn’t. A well-optimized home oven with the right technique produces pizza that’s dramatically better than 90% of what delivery brings — and with three specific methods developed by professional pizza makers, you can push it even further.
The challenge is real, though. Your oven maxes out around 500-550F (260-290C). A professional Neapolitan oven runs at 905F (485C). Thermal radiation follows the T-to-the-fourth power law, which means a 400C oven produces 16 times more radiant heat than a 200C oven. You’re not working with a slightly cooler version of a pizza oven — you’re working with fundamentally different physics.
Understanding what that difference means, and how to compensate, is the entire game.
What Happens During a Home Oven Bake
In a 905F wood-fired oven, pizza bakes in 60-90 seconds. The crust sets almost instantly, the cheese melts in a flash, and the whole thing comes out retaining most of its original moisture.
In your 550F oven, pizza bakes for 7-8 minutes. That’s roughly 5-7 times longer, and three things change dramatically:
More moisture loss. Seven minutes at 550F drives off far more water than 90 seconds at 905F. This is the fundamental reason home oven dough needs higher hydration (65-70%) than wood-fired Neapolitan dough (55-60%). Without the extra water, your crust dries into a cracker.
Slower top browning. Your broiler element or oven ceiling doesn’t radiate nearly as much heat as a 430C refractory brick dome. Cheese and toppings cook slowly, and the Maillard reaction that produces leopard spots and char takes much longer to develop. This is why diastatic malt (0.5-2%) helps — it provides extra sugars for browning at lower temperatures.
Longer structural load. The gluten network in your dough bears weight for 7+ minutes instead of 60 seconds. Weaker flour (like Caputo blue bag, W260-270) can sag or become gummy. Stronger flour (bread flour at 13-14% protein, or Caputo red bag, W300-320) holds up better over the longer bake.
The Single Most Important Upgrade: Baking Steel
Before choosing a method, install a baking steel. The difference between baking on a steel versus directly on the oven rack (or even on a thin baking sheet) is transformative.
Steel conducts heat 18-20 times faster than cordierite stone. Myhrvold’s thermal testing confirms this: “superior to anything [he’d] ever been able to make with a standard stone.” Both steel and stone reach the same equilibrium temperature after a full preheat, but steel transfers that stored heat into the dough base dramatically faster on contact. The result: better bottom char, more even browning, and leopard spots that you simply cannot achieve on stone.
Myhrvold’s optimal spec: 12mm (approximately 1/2 inch) dark carbon steel (A36). For most home bakers, 3/8 inch is the sweet spot — the jump from 1/4 to 3/8 inch is the single most impactful thickness upgrade, while 3/8 to 1/2 inch shows diminishing returns. A 3/8-inch steel recovers enough heat between pizzas to bake 4-5 in a session without significant quality drop.
Position the steel on the rack 6-8 inches below the broiler element. This distance gives you enough clearance to load and retrieve pizza while keeping the steel close enough to the broiler for effective top heat.
Preheat time matters more than you think. Myhrvold’s team found that home oven air heats in 21 seconds, but the walls (and your steel) take much longer. At 22 minutes, significant cold spots remain on the baking surface. Minimum preheat: 45 minutes at maximum temperature. Check with an infrared thermometer: the coolest corner of your steel should be within 5-9F of your target before launching the first pizza. Preheat 15-25F above your target to compensate for the temperature drop when you open the door.
Method 1: Steel + Broiler (Forkish)
This is the most reliable and well-documented home oven method. Forkish built all of his home pizza recipes around it.
Setup
- Baking steel on the upper rack, 6-8 inches below the broiler element
- Preheat oven to maximum (500-550F) for 45-60 minutes
- Switch to broiler on high just before launching
The Bake
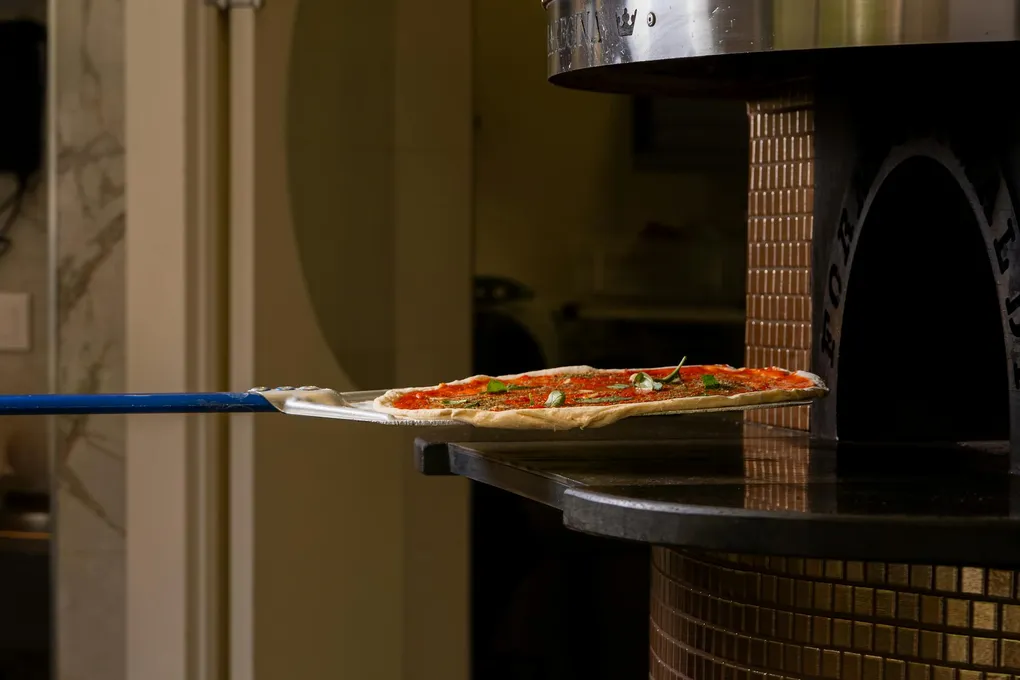
- Launch pizza onto the preheated steel
- Bake 5-6 minutes with the broiler on high (watch the top — broiler intensity varies by oven)
- Rotate 180 degrees with a metal peel
- Finish 1-2 more minutes until the cornicione has dark brown char spots and the cheese is fully melted but not burned
Total bake time: 7-8 minutes.
Why It Works
The steel provides continuous conductive heat from below. The broiler provides intense radiant heat from above, mimicking (at lower power) the radiative dome of a wood-fired oven. The combination attacks the pizza from both directions simultaneously.
Electric Oven Tip
Many electric ovens disable the broiler element if the thermostat reads the oven as “hot enough.” Workaround: preheat at 450F (below the thermostat’s trigger point), then switch to broil. The broiler coils will fire immediately because the oven’s sensor reads the temperature as below the broiler’s threshold.
The FWSY Refinement
Forkish’s Flour Water Salt Yeast protocol adds a step: after preheating at max for 30 minutes, switch to broil for 5 minutes to superheat the steel surface. Then switch back to bake at 525F, load the pizza, bake 5 minutes, and switch to broil for the final 2-3 minutes. This two-phase approach gives you a hotter steel at launch and a broiler finish for top char.
Method 2: Two-Stage Bake (Iacopelli)
This method was developed specifically for home ovens by a 4th-generation Neapolitan Maestro Pizzaiolo who recognized that the biggest home oven problem isn’t crust — it’s cheese timing.
The Problem It Solves
In a home oven, if you load a fully topped pizza, the cheese melts and begins to brown long before the crust finishes baking. You end up with either overcooked cheese or undercooked crust. Iacopelli’s two-stage approach decouples them.
Setup
- Steel on the top rack (closest to the upper element)
- Preheat at broil/max for 30-40 minutes after the oven reaches target temperature
- Switch to static bake at max (250C / 482F) just before launching
The Bake
Stage 1: Launch the pizza with sauce and olive oil only — no cheese, no toppings. Bake until the crust is golden and puffed. The crust gets a head start.
Stage 2: Remove the pizza. Brush olive oil on the crust edges (for color and flavor). Add mozzarella and toppings. Return to the oven until the cheese melts and bubbles.
Total time: 7 minutes maximum. Iacopelli is emphatic: beyond 7 minutes, pizza becomes dry and hard rather than soft-and-crunchy.
Critical Detail: Mozzarella Drainage
If using fresh mozzarella (fior di latte), cut it the night before and drain in a colander in the refrigerator. Fresh mozzarella is roughly 62-65% water (Masi’s data). In a 7-minute home oven bake, that moisture turns the pizza center into a swamp. Overnight draining reduces moisture enough for the cheese to melt cleanly without sogging the base.
Why It Works
The pre-bake gives the crust time to set and develop structure before the cool, wet cheese lands on it. This directly addresses what Myhrvold identifies as the “gel layer” problem — a white, gummy line of undercooked starch between crust and sauce caused by moisture from toppings condensing on the rising dough. By pre-baking the crust, the starch gelatinizes and sets before the sauce can create a cool, wet barrier.
Method 3: Skillet-Broiler (Lopez-Alt)
The no-equipment method. If you don’t own a baking steel, a pizza peel, or any specialized pizza gear, this works with a cast iron skillet you probably already have.
Setup
- Cast iron skillet (10 or 12 inch)
- Oven rack positioned to put the skillet 4-6 inches below the broiler
- Broiler preheated on high for 5 minutes
The Bake
- Heat the skillet on the stovetop over high heat for 3 minutes
- Shape a 10-inch dough, add sauce, cheese, and toppings
- Transfer to the hot skillet (carefully — it sears immediately)
- Slide under the broiler for 90 seconds to 4 minutes, rotating after 45 seconds
- Return to stovetop for 30 seconds to 2 minutes for additional bottom char
Lopez-Alt describes the result: “baby leopard spots, bubbles starting to char, the puff of a cornicione.”
Why It Works
The stovetop-preheated cast iron provides intense conductive heat from below (cast iron’s thermal conductivity of approximately 80 W/mK is actually higher than carbon steel’s 45-58 W/mK). The broiler hammers radiant heat from above. By splitting the heat sources — stovetop for bottom, broiler for top — you simulate a two-directional heat attack similar to a pizza oven’s floor-and-dome setup.
Limitations
- Maximum pizza size is limited to the skillet diameter (10-12 inches)
- Cast iron is heavy and requires oven mitts for the transfer
- Less consistent than the steel methods for large batches (skillet needs to reheat between pizzas)
- Stovetop-to-oven transfer requires confidence and speed
Method 4: Two-Stone/Steel Rotation (Gemignani)
Gemignani calls this his “favorite discovery for home pizza.” It requires two baking surfaces but produces the crispest bottom of any home oven method.
Setup
- Stone or steel on the upper-third rack
- A second stone or steel on the bottom rack
- Preheat at 500F for a full hour
The Bake
- Start the pizza on the top surface. Bake 6 minutes.
- Transfer to the bottom surface using a peel. Rotate 180 degrees during the transfer.
- Finish 5 more minutes on the bottom surface.
Total: approximately 11 minutes.
Why It Works
The bottom surface hasn’t been cooled by contact with dough — it’s been sitting at 500F undisturbed for the entire first bake. When you transfer the pizza to this fresh hot surface, it delivers a second wave of conductive heat that crisps the bottom dramatically. Between pizzas, the top surface recovers its temperature while you bake on the bottom, and vice versa. This rotation system lets you bake continuous batches without quality loss.
Gemignani’s additional rules: brush stones clean with a dry heatproof brush and towel between pizzas. Never use water or a damp towel on hot stones (thermal shock risk). And always return the pizza to the center of the stone after rotating — edges near the oven walls bake unevenly.
Hydration Compensation
Regardless of which method you choose, adjust your dough hydration for the home oven bake time:
| Oven Type | Temp Range | Bake Time | Hydration |
|---|---|---|---|
| Portable (800-950F) | 60-90 sec | Low moisture loss | 60-62% |
| Home oven + steel | 500-550F | 7-8 min | 65-70% |
| Home oven pan pizza | 500-550F | 12-15 min | 70-75% |
The pattern is simple: longer bake = more moisture loss = higher starting hydration to compensate. Using a wood-fired hydration (58%) in a home oven produces stiff, dry crust. Using a home oven hydration (70%) in a portable oven produces soup.
Flour Selection for Home Ovens
Italian 00 flour (W220-270) was designed for 800F+ ovens where the bake finishes before structural weakness matters. In a 7-8 minute bake, the gluten network bears load much longer. Bread flour’s stronger scaffolding outperforms.
Additionally, Italian 00 is typically unmalted — no added diastatic malt, because Maillard browning happens nearly instantly at 800F+. In a home oven at 500-550F, unmalted 00 produces pale, anemic-looking crusts. Fix this with Caputo Americana (which includes malt), Caputo Cuoco/red bag (stronger gluten for longer bakes), or add 0.5-2% diastatic malt powder to any 00 dough. Gemignani uses 2% diastatic malt as standard in most of his formulas.
The Rack Position Decision
Every method in this article places the baking surface on an upper rack — within 6-8 inches of the broiler. This is counterintuitive (most baking puts food in the center), but the reasoning is clear: the broiler provides the radiant top heat that a home oven otherwise lacks.
In a professional pizza oven, the dome radiates enormous heat downward. Your home oven’s ceiling does the same thing only when the broiler is active. Positioning the pizza close to the broiler maximizes this radiant top heat while the steel or stone provides bottom heat.
Exception: Gemignani’s two-stone method uses both upper and bottom positions, alternating. And pan pizza (Sicilian, Detroit) typically bakes on the bottom rack for 12-15 minutes, where the slower, more even heat better suits the thick, pan-enclosed dough.
Practical Tips for Any Method
Open the door as little as possible. Every door opening dumps heat. Myhrvold’s research showed that significant temperature drops occur even from brief openings — and much of the heat that escapes is the radiant ceiling heat that’s hardest to recover.
Use an infrared thermometer. Your oven’s built-in thermometer reads air temperature, but air temperature is not what bakes your pizza. The baking surface temperature is what matters — and it can be 50-100F different from the air reading. Check the center of your steel before every pizza.
Rest finished pizza on a cooling rack. Steam from the hot dough condenses against a flat cutting board, turning a crisp bottom soggy within seconds. A wire cooling rack allows steam to escape downward.
Treat the first pizza as calibration. Even with precise preheating, your first pizza of the session reveals your oven’s actual behavior: hot spots, cold corners, how quickly the broiler chars. Adjust positioning, timing, and rotation for pizzas two through five based on what you learn from pizza one.
Compensate for door-opening heat loss. After loading a pizza, it takes 2-5 minutes for the oven (and especially the steel) to recover to target temperature. If baking multiple pizzas, preheat 15-25F above your target. Between pizzas, close the door and let the oven recover fully before the next launch.
Your home oven will never replicate a 60-second Neapolitan bake. But it’s also not trying to. The methods in this article use your oven’s actual physics — long bakes, moderate heat, directional broiler radiation — to produce pizza that’s optimized for what the equipment can do, rather than fighting what it can’t. That distinction is what makes the difference between pizza that disappoints and pizza you’re genuinely proud of.